yarn wrapped letters & easy kids room art
Someday {hopefully sooner than later} our remodel will be done and we'll actually feel settled. But until then, our house remains to be a constant stream of projects.
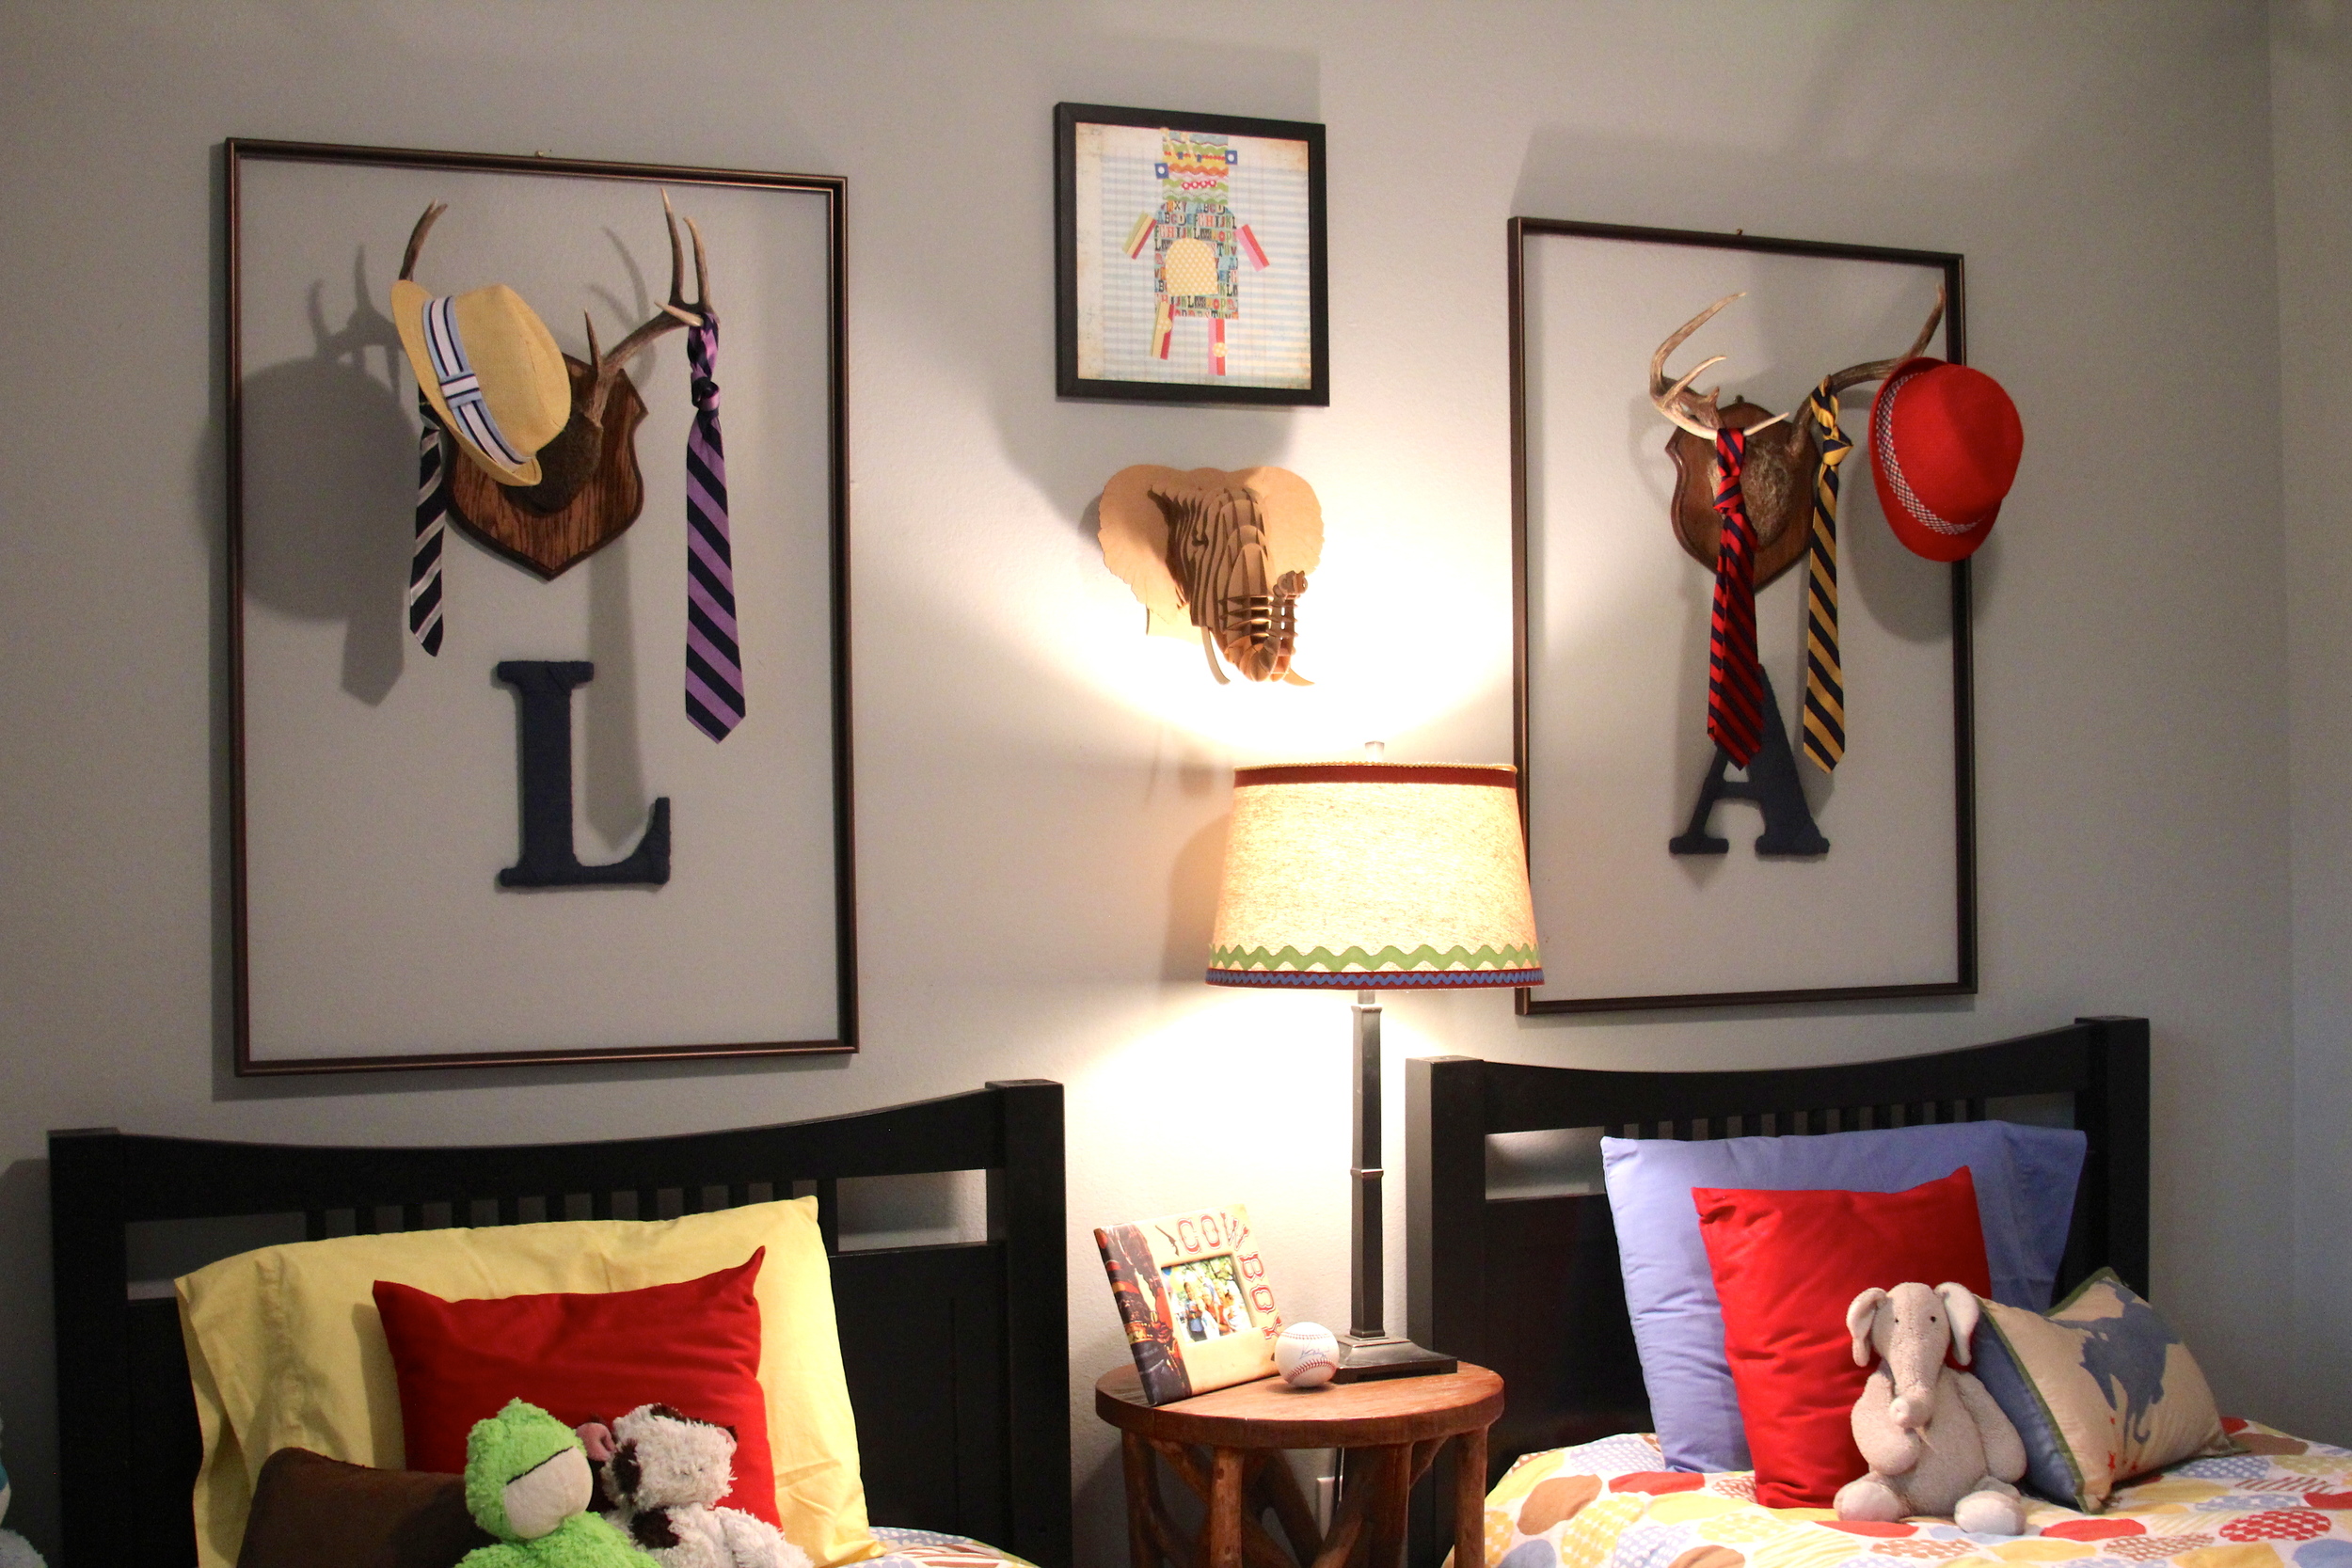
The latest project is Anton & Laith's room.

Since moving into our new house a month or two ago, we've had their room set up with bunk beds, thinking that'd be the best use of space in the tiny room, but Anton and Laith have both been pestering us to make their beds side-by-side so a few nights ago, we went for it {right before bedtime...why'd we do that??? Who knows.}.
Apparently they're better with interiors than I am...because setting them up this way is SO much better.
I now had a big, blank wall above their beds...what should I do up there??

{last week at the San Diego Safari Park}
While looking at photos from our trip to San Diego last week, I was reminded that the boys have been super into hats lately. So I thought it'd be fun to have a place they could hang them...and my idea kind of went from there!

{at the airport heading home}

I've seen photos on Pinterest lately with people wrapping yarn around letters & I thought that would add some fun texture to the room, rather than just painting them.

I went to Hobby Lobby and found these wooden letters on sale & the beautiful blue wool yarn, as well.

Start by taping the yarn securely on the back...

Then start wrapping...

...and wrap some more...

...and some more...

When you're done, tie a knot at the end and stick your pin through {the knot will help the pin stay in place better}.

Secure the pin really well so it doesn't begin to unravel your beautiful work.
Next time, I may paint the letter a similar color to the yarn I use {prior to wrapping, obviously}. Maybe it's the perfectionist in me, but it bugs me a little that I can see a little bit of the wood on my corners...the pic doesn't really show it though.

Since the room is on the small side, I wanted to go UP and use as much wall space as I could, in attempts to make their bedroom look larger.

I found these basic frames on clearance and added antlers we had used previously when the boys had a Cowboy Room a few years ago {yes, Ben shot them...and yes, the venison steaks were fabulous}, then hung their ties and hat.

That first night, Ben & I had to take them down a few hours after bedtime because apparently antlers with hats on them look like monsters.
makes sense.
But since then, they've been fine. And l.o.v.e their new room.


{ties are from jcrew's crew cuts}

Just a reminder of what their room looked like before we moved in. Wish I had a better photo but you're not missing much. Just more orange faux paint and nasty stained carpet. Oh and the popcorn ceiling.
Much {much much much} better, huh.

Should I paint the inside of the frame to add more depth and color? Hm. Maybe. I'll have to think about that one.

I still haven't given up on wanting to do the ceiling like the one in the photo above {talked about it here}.
...Ben? Lets get on it!

quick bonus project:
I didn't take photos of this project but this lampshade was from Pottery Barn long, long ago. I'm not a big fan of rusty/brick red so I thought I'd simply use my glue gun to add some rickrack, etc. Turned out pretty cute!
I love when I do projects where I have pretty much everything on hand!! Don't you??
{here's more on these and other striped lampshades}
